Adding a QR code to a Google Slides presentation is one of the simplest ways to turn a passive deck into something the audience can actually take with them. Whether you are linking to course materials, a feedback form, or a digital business card, the goal is the same: bridge the screen and the phones in the room. This guide covers exactly how to add a QR code in Google Slides using three reliable methods, plus the placement, sizing, and content choices that make the difference between a code people scan and a code people ignore.
Why add a QR code to a Google Slides presentation?
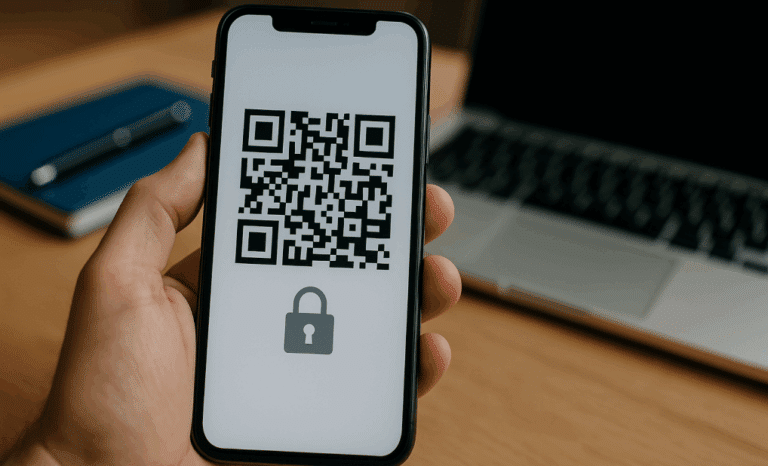
A QR code on a slide gives your audience instant access to something useful without typing a long URL or asking for a link after the session. It works for remote viewers, large rooms where people sit far from the screen, and any moment when you want attention to shift from listening to doing.
Presentations are increasingly hybrid. Some people watch live, others catch up on a recording, and many keep a phone in hand throughout. A QR code respects all of those behaviors. It also removes friction from the most common post-presentation request: “Can you share that link?”
How do you add a QR code in Google Slides?
There are three practical methods to add QR codes to a Google Slides presentation. Each one has a place depending on how much control you need over the design, the destination, and whether you want to update the code later.
- Use Chrome’s built-in QR code generator for quick, one-off codes.
- Use a Google Workspace Marketplace add-on to generate codes directly inside Slides.
- Use a third-party QR code generator and insert the image manually, which is the most flexible option.
Below is how each method actually works.
Method 1: Chrome’s built-in QR code generator
Chrome has a QR code generator baked into the browser, and it is the fastest option when you just need to share the current page.
- Open the page you want to link to in Chrome.
- Click the share icon on the right side of the address bar.
- Select “Create QR code” from the menu.
- Click “Download” to save the code as a PNG.
- In Google Slides, go to Insert, then Image, then Upload from computer, and select the file.
This method is fine for sharing a public URL during a single session. The limitation is real: the code is static. If you change the destination later, the QR will keep pointing to the old URL. Every slide deck reused at a future date risks sending the audience nowhere.
Method 2: a Google Workspace Marketplace add-on
If you prefer to stay inside Slides, the Google Workspace Marketplace has add-ons that generate QR codes without leaving the document.
- Open your presentation and go to Extensions, then Add-ons, then Get add-ons.
- Search for “QR code” in the Google Workspace Marketplace.
- Install the add-on with your Google account.
- Open the add-on from the Extensions menu.
- Enter the URL you want to encode and generate the code directly into the slide.
The advantage is convenience. You stay in one tool, and some add-ons let you customize the color or add a logo. The trade-off is variable quality and limited control over what happens after the deck is shared. Most marketplace add-ons produce static codes too, which leads to the same problem as Chrome’s generator: the destination is locked.

Method 3: a third-party QR code generator
This is the option that gives you full control. You generate the code outside Slides, then drop it in as an image.
- Open a QR code generator in your browser.
- Enter the URL, file link, or content you want behind the code.
- Customize the design if needed: colors, logo, frame, shape.
- Download the code as a high-resolution PNG or JPG.
- In Google Slides, go to Insert, then Image, then Upload from computer.
- Position and resize the code on the slide.
The reason most presenters end up here is simple: only a dedicated platform gives you a dynamic QR code, custom branding that matches your deck, and analytics on what the audience actually scanned. QRCodeKIT is one example of a dynamic QR platform built for exactly these use cases, with the added benefit that the destination can be changed at any time without touching the slide.
Why a dynamic QR code is the right choice for Google Slides
Slides get reused. The same deck gets presented to different audiences, in different rooms, across weeks or months. A static QR code locks you to one destination at the moment of creation. If the link breaks, if the resource moves, or if you want to send a new audience somewhere else, the code on the slide becomes a dead end.
A dynamic QR code solves this. The code on the slide stays the same, but the destination behind it can be updated whenever you need. Present the deck on Monday pointing to a registration form, then update the destination on Friday to point to the recording. No one has to redownload the file. No one notices the change. The code just works.
Dynamic QR codes also report back. You can see how many people scanned, when, and how engagement evolves across sessions. Static codes give you none of that. For a tool meant to measure audience engagement, this matters.
How big should a QR code be on a slide?
A QR code on a Google Slides presentation should be at least 2 by 2 inches on screen for reliable scanning. That is the minimum for someone sitting in the middle rows of a meeting room. For larger venues, conference halls, or any setup where the back row is far from the screen, scale up. There is no penalty for making the code bigger than necessary, and there is a real cost to making it too small to scan.
Always test the code from the actual seat you expect the audience to scan from before the presentation starts. Pull out a phone, open the camera app, and confirm the code resolves cleanly. This single habit catches almost every common mistake.
Where should you place the QR code on a slide?
Place the code away from the corners. Projectors crop edges more often than people expect, and a clipped QR will not scan. The center or a clearly anchored area in the lower third of the slide tends to work best.
Use a light slide background with strong contrast against the QR code. Dark code on a light background is the standard for a reason. Avoid busy patterns, photographic backgrounds, or gradients directly behind the code. They reduce the camera’s ability to read the squares quickly.
Add a shortened URL as text below the code. This is the backup for the small portion of the audience whose phone, lighting, or distance does not cooperate. It also signals where the code leads, which slightly increases scan rates.
What should the QR code link to?
The destination is what makes the code worth scanning. The strongest options match what the audience would actually want at that moment:
- The slide deck itself, so attendees can download or revisit it.
- Supplementary materials like PDFs, product catalogs, or course materials.
- A live poll, quiz, or feedback form for real-time interaction.
- The presenter’s digital business card with contact details and links.
- A company landing page, signup form, or product page.
Match the link to the moment in the deck. A QR code on the title slide can point to the speaker’s digital business card. A QR code on the closing slide can point to a feedback form or a resource library. One code per purpose is clearer than a single code trying to do everything.
Real use cases for QR codes in presentations
Educators link to course materials, reading lists, and quizzes so students can engage during and after class. Sales reps drop a digital business card on the closing slide to capture follow-ups without exchanging paper. Event organizers collect feedback through a form linked from the last slide. Trainers connect their decks to additional resources, exercises, or video walkthroughs. Marketing teams share campaign assets, launch pages, or demo videos with audiences who would otherwise lose the link before getting home.
In every one of these cases, the value comes from making the next step effortless. Scan, open, done.

Common mistakes to avoid
A few patterns show up again and again when QR codes fail during presentations:
- Code sized too small to scan from the back of the room.
- Low contrast or busy patterns behind the code.
- Static codes that point to a URL that changes or expires.
- No test scan from the actual seat before presenting.
- Placing the code in a corner where the projector crops it.
- Forgetting to include the URL as a text backup beneath the code.
Most of these come down to skipping a thirty second test before going live. Build that step into your prep and the rest follows.
Frequently asked questions
Can you scan a QR code directly from a Google Slides presentation on screen?
Yes. Any modern smartphone with a working camera app can scan a QR code displayed on a projected slide or a shared screen, as long as the code is large enough, the contrast is strong, and the projection is in focus. Test from the expected viewing distance before the session.
Is there a free QR code generator for Google Slides?
Yes. Chrome’s built-in QR code generator is free, several Google Workspace Marketplace add-ons offer free tiers, and most dedicated QR code platforms offer a free plan for a small number of codes. QRCodeKIT, for instance, offers a free plan with dynamic QR codes included.
How do you edit a QR code after inserting it into a slide?
You cannot edit the content of a static QR code after it has been generated. You would need to create a new one and replace the image. A dynamic QR code is different: the image stays the same, but the destination URL can be updated from the platform dashboard at any time, even after the slide has been shared or printed.
Do QR codes work in printed handouts of Google Slides?
Yes. Export the slides as PDF or print directly from Slides. The QR code will scan from paper as long as the print quality is decent and the code is not scaled below 2 by 2 centimeters on the page. Test a printed copy before distributing a batch.
Can you track who scans a QR code on a slide?
Only with a dynamic QR code. Static codes provide no analytics. Dynamic codes report scan counts, timing, and other engagement signals that help you understand which sessions, slides, or audiences drove the most interaction.
All images and visual content in this article were created using RealityMAX.